Ansible使用文档
安装
使用pip安装ansible:sudo pip install ansible
基本使用
创建配置文件/etc/ansible/hosts
加入受控端ip,这些受控ip可以使用ssh登录(public SSH key必须在这些系统的authorized_keys中)
$ cat /etc/ansible/hosts
10.19.200.194
为了避免在建立SSH连接时,重复输入密码你可以这么做:
$ ssh-agent bash
$ ssh-add ~/.ssh/id_rsa
基本用法:
$ ansible <pattern> -m <module_name> -a <arguments>
pattern用于匹配主机,以下是pattern的例子:
# 全部主机
all
*
# 一个或多个IP地址或主机名
one.example.com
one.example.com:two.example.com
192.168.1.50
192.168.1.50:192.168.1.51
# 一个或多个主机组
webservers
webservers:dbservers
# 在webservers组但不在phoenix组:
webservers:!phoenix
# 交集
webservers:&staging
# 通配符
*.example.com
*.com
192.168.1.*
# 添加排除条件或使用@来指定主机
ansible-playbook site.yml --limit datacenter2
ansible-playbook site.yml --limit @retry_hosts.txt
显示pattern匹配的主机
$ ansible all --list-hosts
  hosts (1):
    10.19.200.194
查看变量
$ ansible all -m setup
ping测试
$ ansible all -m ping
执行命令
$ ansible all -a "/bin/echo hello"
传输文件并设置权限
$ ansible webservers -m file -a "dest=/srv/foo/b.txt mode=600 owner=mdehaan group=mdehaan"
软件包管理
# 确认一个软件包已经安装,但不去升级它:
$ ansible webservers -m yum -a "name=acme state=present"
# 确认一个软件包的安装版本:
$ ansible webservers -m yum -a "name=acme-1.5 state=present"
# 确认一个软件包还没有安装:
$ ansible webservers -m yum -a "name=acme state=absent"
用户相关
# 创建
ansible all -m user -a "name=foo password=<crypted password here>"
# 删除
ansible all -m user -a "name=foo state=absent"
服务管理
$ ansible webservers -m service -a "name=httpd state=started"
$ ansible webservers -m service -a "name=httpd state=restarted"
$ ansible webservers -m service -a "name=httpd state=stoped"
关闭known_hosts确认
$ vim /etc/ansible/ansible.cfg
[defaults]
host_key_checking = False
Inventory文件
主机和组
/etc/ansible/hosts 文件的格式与windows的ini配置文件类似,方括号[]中是组名,用于对系统进行分类,便于对不同系统进行个别的管理:
mail.example.com

[webservers]
foo.example.com
bar.example.com

[dbservers]
one.example.com
two.example.com
three.example.com
指定ssh端口
badwolf.example.com:5309
设置别名
jumper ansible_ssh_port=5555 ansible_ssh_host=192.168.1.50 ansible_ssh_user=mpdehaan
正则匹配
[webservers]
www[01:50].example.com
[databases]
db-[a:f].example.com
主机变量
[atlanta]
host1 http_port=80 maxRequestsPerChild=808
host2 http_port=303 maxRequestsPerChild=909
组变量
[atlanta]
host1
host2

[atlanta:vars]
ntp_server=ntp.atlanta.example.com
proxy=proxy.atlanta.example.com
可用参数
ansible_ssh_host
      将要连接的远程主机名.与你想要设定的主机的别名不同的话,可通过此变量设置.

ansible_ssh_port
      ssh端口号.如果不是默认的端口号,通过此变量设置.

ansible_ssh_user
      默认的 ssh 用户名

ansible_ssh_pass
      ssh 密码(这种方式并不安全,我们强烈建议使用 --ask-pass 或 SSH 密钥)

ansible_sudo_pass
      sudo 密码(这种方式并不安全,我们强烈建议使用 --ask-sudo-pass)

ansible_sudo_exe (new in version 1.8)
      sudo 命令路径(适用于1.8及以上版本)

ansible_connection
      与主机的连接类型.比如:local, ssh 或者 paramiko. Ansible 1.2 以前默认使用 paramiko.1.2 以后默认使用 'smart','smart' 方式会根据是否支持 ControlPersist, 来判断'ssh' 方式是否可行.

ansible_ssh_private_key_file
      ssh 使用的私钥文件.适用于有多个密钥,而你不想使用 SSH 代理的情况.

ansible_shell_type
      目标系统的shell类型.默认情况下,命令的执行使用 'sh' 语法,可设置为 'csh' 或 'fish'.

ansible_python_interpreter
      目标主机的 python 路径.
Playbooks
Playbooks是Ansible的配置,部署,编排语言.他们可以被描述为一个需要希望远程主机执行命令的方案,或者一组IT程序运行的命令集合。
简单理解就是一个定义哪些主机执行什么任务的配置文件。
简单例子
---
# 第一个play
- hosts: webservers  # 主机组
  vars:  # 定义变量
    http_port: 80
    max_clients: 200
  remote_user: root  # 远程登录的用户
  tasks:  # 任务列表
    - name: test connection  # 任务名(备注)
      ping:  # 测试连通性
      remote_user: root  # 执行任务的用户
    - name: ensure apache is at the latest version
      yum: pkg=httpd state=latest  # 使httpd更新到最新版
    - name: write the apache config file
      template: src=/srv/httpd.j2 dest=/etc/httpd.conf  # 使用模版文件
      notify:  # 会在task结束后执行,只会被触发一次
        - restart apache
    - name: ensure apache is running
      service: name=httpd state=started
  handlers:  # 在发生改变时执行的操作
    - name: restart apache
      service: name=httpd state=restarted
# 第二个play
- hosts: my_nginx
  remote_user: root
  tasks:
    - service: name=nginx state=started
      sudo: yes
    - name: disable selinux  # 关闭selinux
      command: /sbin/setenforce 0
执行一个 playbook
ansible-playbook playbook.yml -f 10
查看playbook的主机
ansible-playbook playbook.yml --list-hosts
include
使用include引入tasks或handlers,并且通过vars传递变量
tasks:
  - include: wordpress.yml
    vars:
        wp_user: timmy
        some_list_variable:
          - alpha
          - beta
          - gamma
---
# wordpress.yml

- name: placeholder foo
  command: /bin/foo

- name: placeholder bar
  command: /bin/bar
Roles
使用Roles管理目录结构
项目的结构如下:
site.yml
webservers.yml
fooservers.yml
roles/
   common/
     files/
     templates/
     tasks/
     handlers/
     vars/
     defaults/
     meta/
   webservers/
     files/
     templates/
     tasks/
     handlers/
     vars/
     defaults/
     meta/
playbook 如下:
---
- hosts: webservers
  roles:
     - common
     - webservers
facts
使用facts获取信息
Facts通过访问远程系统获取相应的信息. 一个例子就是远程主机的IP地址或者操作系统是什么. 使用以下命令可以查看哪些信息是可用的:
ansible hostname -m setup
facts变量用法:
{{ ansible_nodename }}
{{ ansible_hostname }}
{{ ansible_eth0.ipv4.address }}
{{ ansible_devices.sda.model }}

{{ hostvars['asdf.example.com']['ansible_os_family'] }}
关闭facts,加快执行速度
- hosts: all
  gather_facts: F
Jinja2
{% if 'webserver' in group_names %}
   # some part of a configuration file that only applies to webservers
{% endif %}


{% for host in groups['app_servers'] %}
   {{ hostvars[host]['ansible_eth0']['ipv4']['address'] }}
{% endfor %}
vars
使用外部的变量文件,这可以保证你共享playbook源码时隔离敏感数据的风险。
---

- hosts: all
  remote_user: root
  vars:
    favcolor: blue
  vars_files:
    - /vars/external_vars.yml

  tasks:
  - name: this is just a placeholder
    command: /bin/echo foo
每个变量文件的内容是一个简单的YAML文件
---
# in the above example, this would be vars/external_vars.yml
somevar: somevalue
password: magic
在命令行中传递变量
ansible-playbook release.yml --extra-vars "version=1.23.45 other_variable=foo"
使用json文件作为变量
ansible-playbook release.yml --extra-vars "@some_file.json"
条件选择
可以使用when作为task、include、roles的条件判断
tasks:
  - name: "shutdown Debian flavored systems"
    command: /sbin/shutdown -t now
    when: ansible_os_family == "Debian"
还可以使用过滤器作为when执行条件:
tasks:
  - command: /bin/false
    register: result
    ignore_errors: True
  - command: /bin/something
    when: result|failed
  - command: /bin/something_else
    when: result|success
  - command: /bin/still/something_else
    when: result|skipped
使用多个条件
tasks:
  - shell: echo "only on Red Hat 6, derivatives, and later"
    when: ansible_os_family == "RedHat" and ansible_lsb.major_release|int >= 6
使用define判断变量是否已经定义
tasks:
    - shell: echo "I've got '{{ foo }}' and am not afraid to use it!"
      when: foo is defined

    - fail: msg="Bailing out. this play requires 'bar'"
      when: bar is not defined
指定主机执行
delegate_to指示Ansible在远程主机执行任务时,以指定的远程主机而不是目标主机作为委派主机执行任务。这可以用于需要在不同主机上执行任务的情况。
- name: 在远程主机上复制文件
  copy:
    src: some_file
    dest: /path/to/dest
  delegate_to: "{{ remote_host }}"
变量文件与模版
配置文件的模版:
- name: template a file
   template: src={{ item }} dest=/etc/myapp/foo.conf
   with_first_found:
     - files:
        - {{ ansible_distribution }}.conf
        - default.conf
       paths:
        - search_location_one/somedir/
        - /opt/other_location/somedir/
注册变量
register关键词决定了把结果存储在哪个变量中。结果参数可以用在模版中,动作条目,或者 when 语句。
- name: test play
  hosts: all
  tasks:
      - shell: cat /etc/motd
        register: motd_contents
      - shell: echo "motd contains the word hi"
        when: motd_contents.stdout.find('hi') != -1
循环
使用with_items进行循环
- name: add several users
  user: name={{ item }} state=present groups=wheel
  with_items:
     - testuser1
     - testuser2
传入字典
- name: add several users
  user: name={{ item.name }} state=present groups={{ item.groups }}
  with_items:
    - { name: 'testuser1', groups: 'wheel' }
    - { name: 'testuser2', groups: 'root' }
嵌套循环
- name: give users access to multiple databases
  mysql_user: name={{ item[0] }} priv={{ item[1] }}.*:ALL append_privs=yes password=foo
  with_nested:
    - [ 'alice', 'bob' ]
    - [ 'clientdb', 'employeedb', 'providerdb' ]
随机选择
- debug: msg={{ item }}
  with_random_choice:
     - "go through the door"
     - "drink from the goblet"
     - "press the red button"
     - "do nothing"
Do-Until循环
重试一个任务直到达到某个条件
- action: shell /usr/bin/foo
  register: result
  until: result.stdout.find("all systems go") != -1
  retries: 5
  delay: 10
递归运行shell模块,直到模块结果中的stdout输出中包含”all systems go”字符串,或者该任务按照10秒的延迟重试超过5次.”retries”和”delay”的默认值分别是3和5.
特殊特性
异步操作和轮询
---
- hosts: all
  remote_user: root
  tasks:
  - name: simulate long running op (15 sec), wait for up to 45 sec, poll every 5 sec
    command: /bin/sleep 15
    async: 45
    poll: 5
如果你不需要等待任务执行完毕,你可以指定 poll 值为0而启用 “启动并忽略”
---
# Requires ansible 1.8+
- name: 'YUM - fire and forget task'
  yum: name=docker-io state=installed
  async: 1000
  poll: 0
  register: yum_sleeper

- name: 'YUM - check on fire and forget task'
  async_status: jid={{ yum_sleeper.ansible_job_id }}
  register: job_result
  until: job_result.finished
  retries: 30
测试模式
ansible-playbook foo.yml --check
显示不同
ansible-playbook foo.yml --check --diff --limit foo.example.com
只执行一次
---
# ...
  tasks:
    # ...
    - command: /opt/application/upgrade_db.py
      run_once: true
    # ...
使用代理
- hosts: all
  remote_user: root

  tasks:

    - apt: name=cobbler state=installed
      environment:
        http_proxy: http://proxy.example.com:8080
忽略错误
- name: this will not be counted as a failure
  command: /bin/false
  ignore_errors: yes
判断错误
- name: this command prints FAILED when it fails
  command: /usr/bin/example-command -x -y -z
  register: command_result
  failed_when: "'FAILED' in command_result.stderr"
标签
tasks:

    - yum: name={{ item }} state=installed
      with_items:
         - httpd
         - memcached
      tags:
         - packages

    - template: src=templates/src.j2 dest=/etc/foo.conf
      tags:
         - configuration
只想运行一个非常大的 playbook 中的 “configuration” 和 “packages”,你可以这样做:
ansible-playbook example.yml --tags "configuration,packages"
只想执行 playbook 中某个特定任务 之外 的所有任务,你可以这样做:
ansible-playbook example.yml --skip-tags "notification"
Vault
vault 可以加密任何 Ansible 使用的结构化数据文件.
灵活运行
列出任务Tag
ansible-playbook playbook.yml --list-task
从指定的任务开始执行playbook
ansible-playbook playbook.yml --start-at="install packages"
分步交互式的执行playbook
ansible-playbook playbook.yml --step
playbook的”free”执行模式
---
- hosts: all_server
  strategy: free
  gather_facts: no

  tasks:
      - name: free mode debug
        debug:
          msg: "free mode debug"

      - name: sleep
        shell: sleep 10
        when: server_type == "game"

      - name: free mode ping
        ping:
默认的值的是linear,就是按批并行处理,在free模式下,ansible执行不再是一批一批,而是以主机为粒度,一个主机一直执行任务直到完成
ps: 如果使用free模式,一旦出现不同主机进行不同任务时错误退出,再次执行会很麻烦
模块相关
列出已安装的模块
ansible-doc -l
查看模块文档
ansible-doc yum
ansible-doc -s yum  # 简略版
常用模块
命令模块
    command
    shell
文件模块
    copy
    fetch
    file
安装模块
    yum
服务模块
    service
挂载模块
    mount
定时任务
    cron
用户模块
    group
    user
压缩解压
    unarchive
基础信息
    setup
连通测试
    ping
可以直接在远程主机上执行命令,并将结果返回本主机。注意,该命令不支持 | 管道命令
cron模块
管理cron计划任务的
常用demo
测试连通:ansible xxx -m ping
执行命令:ansible xxx -a "ls"
复制文件:ansible xxx -m copy -a "src=/xxx dest=/xxx"
添加定时任务:ansible xxx -m cron -a "name='监控游戏服错误日志文件' minute=5 hour=0 job='python3 xxx.py'"
配置文件
配置文件(按照查找顺序排列)
* ansible.cfg (位于当前目录中)
* ANSIBLE_CONFIG (一个环境变量)
* .ansible.cfg (位于家目录中)
* /etc/ansible/ansible.cfg
回调模块
修改配置文件:/etc/ansible/ansible.cfg
callback_whitelist = timer, profile_tasks # 任务计时(自带的模块)
自定义回调修改配置:callback_plugins
其它
playbook设置变量
https://docs.ansible.com/ansible/latest/collections/ansible/builtin/set_fact_module.html
- name: 设置变量
  set_fact:
    two_dict: {'something': here2, 'other': somewhere}
    two_list: [1,2,3]
借助ChatGpt编写playbook
这里提供一个提问样板,回答的准确性还是可以的。
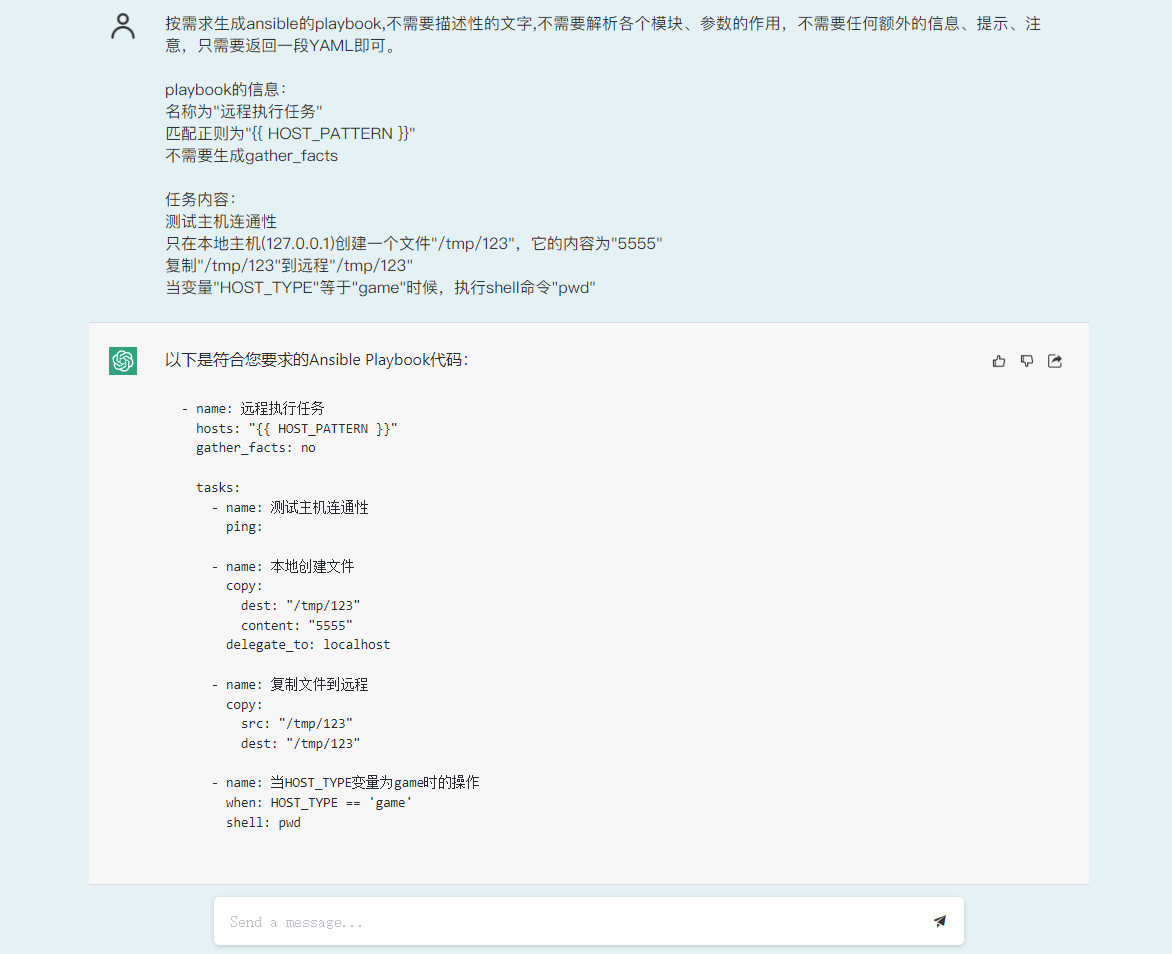
按需求生成ansible的playbook,不需要描述性的文字,不需要解析各个模块、参数的作用,不需要任何额外的信息、提示、注意,只需要返回一段YAML即可。

playbook的信息:
名称为"远程执行任务"
匹配正则为"{{ HOST_PATTERN }}"
不需要生成gather_facts

任务内容:
测试主机连通性
只在本地主机(127.0.0.1)创建一个文件"/tmp/123",它的内容为"5555"
复制"/tmp/123"到远程"/tmp/123"
当变量"HOST_TYPE"等于"game"时候,执行shell命令"pwd"
返回结果:
- name: 远程执行任务
  hosts: "{{ HOST_PATTERN }}"
  gather_facts: no

  tasks:
    - name: 测试主机连通性
      ping:

    - name: 本地创建文件
      copy:
        dest: "/tmp/123"
        content: "5555"
      delegate_to: localhost

    - name: 复制文件到远程
      copy:
        src: "/tmp/123"
        dest: "/tmp/123"

    - name: 当HOST_TYPE变量为game时的操作
      when: HOST_TYPE == 'game'
      shell: pwd